eCommerce CRO Checklist v1.2 is live


Blog
•
Configure HTTPS on AWS EC2 for Free Using Cloudflare
In this article, I hope I can show you how to protect your front-end application hosted in AWS EC2 (or any server) with an SSL certificate.

One time, I was building a web application in React and an infrastructure written in Golang. After I finished the project I wanted to deploy it somewhere. For the React application, I deployed it to Netlify (which is a great tool by the way) and, surprise surprise, it already had an SSL certificate in my Netlify application, which was awesome. For the application written in Golang, I tried an AWS EC2 free tier to test my project, but the thing that I wasn’t expecting (because I didn’t think this through) is that the EC2 machine didn’t have an SSL certificate, and, as you know, a secure connection can’t perform requests on insecure servers (HTTPS -> HTTP).
When you face a similar problem, if you do a quick search you’ll see that there is a great certificate authority that can generate one to your server for free. I’m talking about Let’s Encrypt, but there is a catch: because AWS EC2 free tier is commonly used and associated with spam, they blocked the EC2 domain, which means that it won’t work.
Cloudflare — Part 1 of the solution
Cloudflare, as you might know, offers a free SSL certificate with DDoS protection on their platform, and you might ask yourself why do they do this? Well, because they want traffic to go through their servers so that they can distinguish “good traffic” from “bad traffic”, everybody wins in this case.
To do this simple solution you need three things:
Register a domain (you can use free domains, at the time I used the Freenom website to register a .tk domain for 12 months);
Register a Cloudflare account;
Install NGINX on your AWS EC2 machine.
The first point is straightforward, you can get a free domain and then you can pass to the creation of your Cloudflare account. If you follow the steps carefully you’ll get to the DNS screen where you can map your recently purchased domain with your EC2 IP address (or domain)
Press enter or click to view image in full size

DNS Configuration
For this to work, you’ll have to change your domain default name servers to point to Cloudflare’s ones (you should have this setting in your domain management console/dashboard). Please note that this change on your domain can take up to 24 hours to change.
Press enter or click to view image in full size
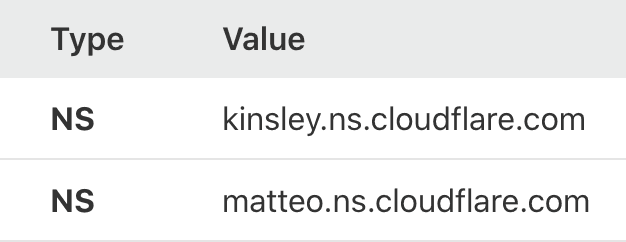
Cloudflare’s name servers
With this, every request will go to Cloudflare services providing you automatically a free SSL certificate (HTTPS connection), and because you did the DNS configuration where your domain is mapped to your EC2 server, the requests will arrive there but won’t show anything because you didn’t set up any web server / reverse proxy. Now it’s time to set up NGINX on our server.
NGINX Configuration — Part 2 of the solution
Because you could have chosen a different AMI (Amazon machine image) than me I’m going to explain to you how you can configure NGINX specifically for your version.
Log in into your EC2 server and type
In the output, you can see the Linux version installed in your image, in my case was Centos. In the official NGINX documentation, you can find the tutorials on how to install NGINX on your specific Linux version (read more).
In my case, the commands that I needed to configure NGINX:
Now, if you access your domain using HTTP you’ll reach a default NGINX page. But this is not what you want. You want to access your domain using HTTPS. For this just update your NGINX configuration file
and add,
With this, you will receive requests port 443 and forward those requests to your server port (in this case 9000, which was my Golang server port).
If you notice I’ve added private SSL certificates generated for NGINX. Using OpenSSL you can easily create these certificates.
You will be asked a series of questions, you can just hit enter for everyone, this part is not covered for this tutorial and it’s not mandatory.
And that’s it. If you access your application with HTTPS (using your domain) it will successfully reach your backend on port 9000. Simple and secure.
